The Ultimate Guide to the Perfect Steak: Pan-Seared Oven-Finished
Achieve Restaurant-Quality Results in Your Own Kitchen
Craving that steakhouse-worthy sear and a melt-in-your-mouth tender interior? Look no further! In this comprehensive guide, we'll unlock the secrets to cooking the perfect steak using the revered method of searing on the stovetop followed by a gentle finish in the oven. This technique, favored by culinary professionals, guarantees a deeply caramelized crust that seals in all the flavorful juices, leading to a steak that's nothing short of spectacular. Forget dry, unevenly cooked disappointments – get ready to master the art of the pan-seared oven-finished steak and impress your family and friends with your newfound culinary prowess.
This guide will walk you through the process of cooking a perfectly seared steak using equipment most home kitchen's already have. If you're an apartment dweller, no need to envy over a grill. This method, often used by professional chefs, ensures a beautiful, deeply browned crust while keeping the inside tender and juicy.

Ingredients & Equipment
Steak: A thick-cut steak (1.5 to 2 inches) works best for this method. Ribeye, New York strip, and filet mignon are excellent choices.
High-Smoke-Point Oil: Avocado, grapeseed, or canola oil are ideal. Avoid olive oil as its low smoke point will cause it to burn. Also avoid butter as the milk dairy particles remaining will burn.
Salt: Coarse salt like kosher or sea salt.
Black Pepper: Freshly ground is best.
Butter (Optional): A tablespoon of unsalted butter for basting at the end.
Aromatics (Optional): Garlic cloves, fresh thyme, or rosemary sprigs.
Oven-Safe Pan: A cast-iron skillet is highly recommended due to its ability to retain and distribute heat evenly. A stainless steel pan also works well.
Tongs: For easy handling of the steak.
Meat Thermometer: The most crucial tool for ensuring your steak is cooked to your desired doneness.
Cutting Board: With a channel to catch juices.
Instructions
Step 1: Preparation (The Day Before or an Hour Before)
Dry Brine the Steak: For the most flavorful and tender steak, liberally season it on all sides with kosher or sea salt at least an hour before cooking, or even better, a day in advance. Place the salted steak on a wire rack over a baking sheet and refrigerate uncovered. This process draws moisture from the surface, creating a drier exterior that will result in a better crust.
Bring to Room Temperature: About 30-45 minutes before cooking, remove the steak from the refrigerator. Let it sit on the counter to come to room temperature. A cold steak will cook unevenly.
Pat Dry: Before cooking, use paper towels to pat the steak completely dry. Any moisture on the surface will create steam and prevent a good sear.
Preheat the Oven: Place an oven rack in the middle position and preheat your oven to 225°F.
Step 2: The Sear
Heat the Pan: Place your oven-safe skillet over high heat on the stovetop. Let it get very hot—it should be smoking slightly. This is critical for achieving a good sear.
Add Oil: Add a thin layer of high-smoke-point oil to the hot pan. It should shimmer almost instantly.
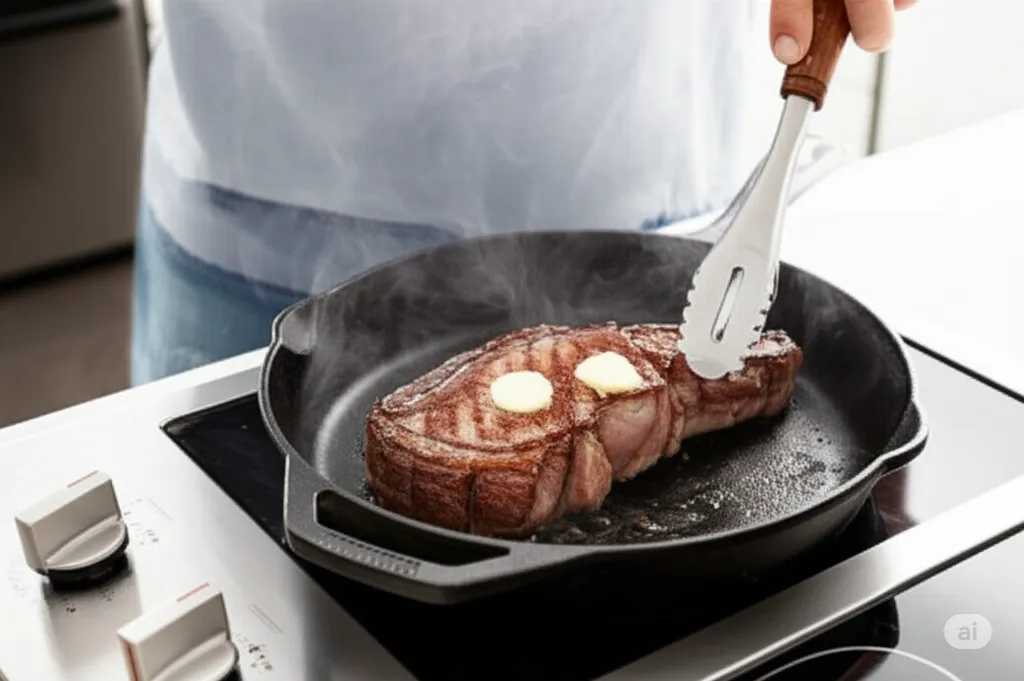
Sear the Steak: Carefully place the steak in the hot pan. You should hear a loud, immediate sizzle. Do not move the steak for 90 seconds to 2 minutes. This is the crucial time for forming a deep, brown crust.
Flip: Use tongs to flip the steak. You should see a dark brown, crusty exterior. Sear the second side for another 90 seconds to 2 minutes.
Sear the Edges: Use your tongs to hold the steak on its sides and sear the edges, about 30 seconds per side.
Step 3: Finishing in the Oven
Add Aromatics (Optional): If using, add a tablespoon of butter, a few crushed garlic cloves, and sprigs of fresh thyme or rosemary to the pan. The butter will melt and sizzle, releasing the flavors of the aromatics.
Transfer to the Oven: Carefully transfer the entire skillet to the preheated oven.
Cook to Desired Doneness: This is where the meat thermometer is essential. Cook times will vary depending on the thickness of your steak. I have found for a medium-rare, it's about 5-8 minutes depending on thickness.
Rare: 120-125°F (49-52°C)
Medium-Rare: 130-135°F (54-57°C)
Medium: 140-145°F (60-63°C)
Medium-Well: 150-155°F (66-68°C)
Check Temperature: Insert the meat thermometer horizontally into the thickest part of the steak, avoiding the bone. Remove the steak from the oven when it is about 5°F below your target temperature, as it will continue to cook as it rests.
Step 4: The Rest
Rest the Steak: Remove the skillet from the oven and transfer the steak to a cutting board. Do not skip this step!
Resting Time: Let the steak rest for at least 5-10 minutes. This allows the juices, which have been forced to the center of the steak during cooking, to redistribute throughout the meat. Cutting the steak too soon will cause the juices to run out, resulting in a dry, tough piece of meat.
Slice and Serve: After resting, slice the steak against the grain. Serve immediately and enjoy your perfectly cooked steak!
Congratulations, you've now embarked on the journey of steak perfection! By mastering the sear-and-oven technique, you can confidently cook restaurant-quality steaks in the comfort of your own kitchen (or wherever your culinary adventures take you!). Remember the key steps: a good sear, precise oven cooking using a thermometer, and that all-important rest. With a little practice, you'll be enjoying juicy, flavorful steaks with a beautiful crust every time. So fire up that stovetop, preheat your oven, and savor the satisfaction of creating a truly unforgettable steak experience.
Tired of Takeout? Stop wasting money and start cooking with confidence. Get The Adulting Blueprint: Kitchen Level-Up Kit today!
Return to Adulting Playbook home or Adulting 101 course.
